DIY Homemade Dye Free Snow Cone Recipe

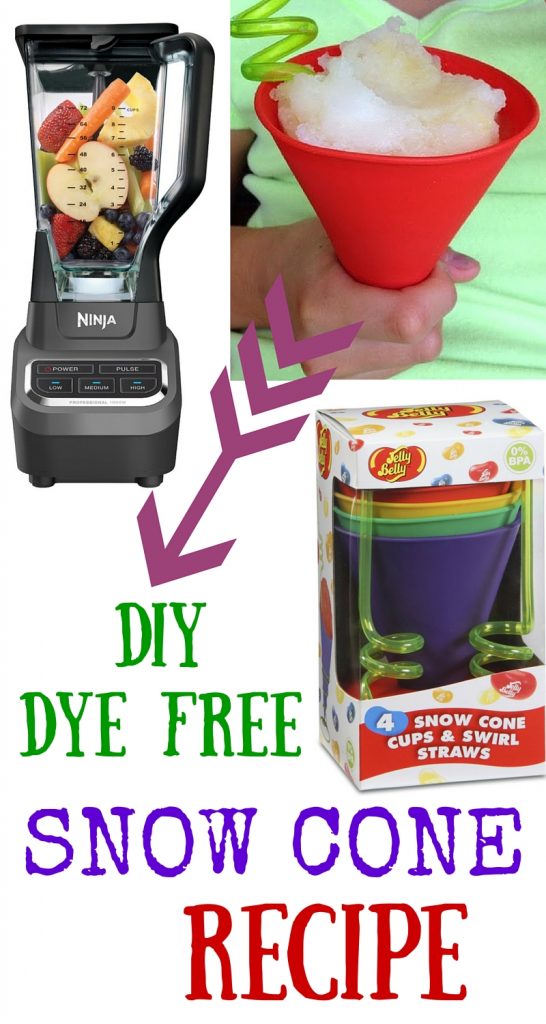
DIY DYE FREE Snow Cone Recipe - Fun for the whole family! Dye Free, Allergy Friendly, Gluten, and Dairy Free too!

(For your convenience affiliate links are included-if a purchase is made through these direct links it does help support this blog)

Have you every made your own snow cones? Summer is just getting started and we are excited to ‘dive in’ . Here at “My Happy Homestead” there are some long standing traditions that have just become a staple –

Yes, making our own snow cones is really one of our ‘must do‘ homestead activities– no food dyes, no artificial ingredients- just memories. If there’s time in your schedule this one is super quick, easy, and inexpensive.

DIY Dye Free- Homemade Snow Cone Recipe - gluten and dairy free too!

Homemade Dye Free Snow Cones

Ingredients; 
Ice
Frozen fruit juice concentrate or berry sauce
Other Supplies Needed;
Snow cone cups and straws (we have these and love them)
Blender or snow cone machine
Direction;
Prepare syrup. Simply combine 2 parts juice concentrate to 1 part water. You can also make your own berry sauce if preferred-it is just heavenly on a hot day. Thin berry sauce as needed with a bit of water. (Our most recent snow cones were orange pineapple…yummmmy!)
Shave ice in blender or if you have a cute little snow cone machine then use that. Using an ice cream scoop put desired amount of shaved ice in each of your snow cone cups-carefully pour syrup on top and dive in!

Printable Recipe

Supplies;

Make your own dye free snow cones like a Ninja - find out howLearn how to make your own dye free snow cones for summer - fun for the whole family. Mom and Kid approved!


Homestead Crock Pot Whole Chicken and Overnight Chicken Stock Recipe


Gluten-free, recipe, slow cooker, homemade, easy recipe, simple dinners


Homestead Crock-pot Whole Chicken and Overnight Chicken Stock Recipe

Over Night Slow Cooker Chicken Stock

I have certainly tried my share of chicken recipes over the years and this one seriously does not get any easier. Especially when using the bones from the “Homestead Crockpot Whole Chicken” (see below) -once all the meat is removed leave all other remains in the crock pot (skin, bones, juices, absolutely everything). Our crockpot is nothing fancy it very similar to this.


Add the following;


2 stalks of celery


1 peeled and loosely chopped onion


1 carrot roughly chopped


2 bay leafs,


A dash of thyme and rosemary

Fill the crock pot with water covering all bones, skins, and veggies (leaving approximately 1/2-1 inch from the top of the crockpot). Put the crockpot on low (cooking 8-10 hours) overnight. In the morning  using a soup ladle or slotted spoon scoop out and discard all the bones, cooked veggies, etc. Once only the broth remains I like to place it in the fridge for a day so that the fat solidifies on top. Skim the fat, discard, and sieve to catch any remaining herbs and skin.

Using a liquid measuring cup, and a freezer zip lock bag- freeze in 2-3 C. portions for future use. I like to freeze the bags flat to make the best use of our freezer space. Ice Cube trays are perfect for freezing small cubes of stock for those “just need a bit” moments.

Homestead Crockpot Whole Chicken Recipe

Ingredients;

2 T Minced Garlic

1 Tsp. Salt

1 Tsp. Fresh Ground Pepper

1/2 Tsp. Rosemary

1 Onion

1 Lemon

1/4 C. of Water

1 Large Chicken

Instructions;

  • Combine all of the dried spices in a bowl.
  • Add water and roughly chopped onion in the bottom of the crockpot.
  • Prepare chicken; remove the giblets. Place chicken in crockpot (on top of the onions) and squeeze lemon juice on top. Throw the lemon in the bottom of the crockpot once finished.
  • Gently rub chicken with minced garlic and the dried spices until evenly coated. Using a kitchen glove you can loosen the skin of the chicken for easy seasoning of the meat.
  • Cover and cook on high 4-5 hours (based on a 3-4 lb chicken) cook until internal temperature is 160+, juices run clear- or if your like me when the meat is falling off the bone.
  • Let rest 5-10 minutes and serve. Leave bones, skin, onion, and lemon in the crock pot for a yummy overnight chicken stock (see above)

Printable Recipe

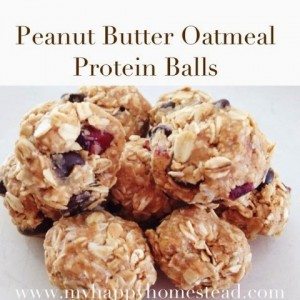
Peanut Butter Oatmeal Protein Balls

Energy balls, healthy snacks, dessert

Peanut Butter Oatmeal Protein Balls

This recipe is so easy to make-and, the best part is the variations are endless. Sort of like my muffin recipe-I really do use whatever I have on hand- eliminating unnecessary trips to the store and access spending. 

Yields; approximately 2 dozen

Ingredients;

1 1/2 gluten-free oats (or regular old fashion)

1/2 C. peanut butter (almond, sunbutter, or cashew all work great too)

1/2 C. honey

1/4 C. mix-ins (chocolate chips, coconut flakes, or raisins)

Dash of cinnamon (optional)

Instructions;

1. Place oats in food processor and pulse until ground finely.

2. In a large mixing bowl combine the peanut butter, honey, and coconut oil until combine thoroughly.

3. Gradually add the ground oats to the peanut butter, honey, and coconut mixture- mixing continuously until all blended.

4. Gently fold in your desired add-ins (this is one of those things like granola and muffins-I throw whatever I have on hand in them)

5. Using a a kitchen teaspoon (or I use our OXO melon-baller) scoop and roll into balls.

6. Eat and enjoy or Freeze* for future use

When freezing- place balls on parchment paper -freeze for 30-40 minutes then remove and store in a ziplock bag. Label and place back in the freezer for later (just an FYI these taste really good cold or at room temp). They can remain in the freezer for up to 3 months but ours never make it but a couple of weeks.